No matter how much we deny it, photography is a science. The earliest photographers in history, the inventors of the craft we love so much, were all chemists and scientists experimenting with light and ways to record it.
To capture photographs that are true works of art and reflective of our artistic visions, we must master the science of exposure; capturing the correct exposure while using the settings we need. Looking over the examples above, let's break down the science:
The Struggle is Real The seasaw above represents this scientific calculation, and here's how (see below). When trying to figure out how to balance art and science, it is important to learn the three elements that make up exposure, which are: ISO, SHUTTER SPEED, AND APERTURE 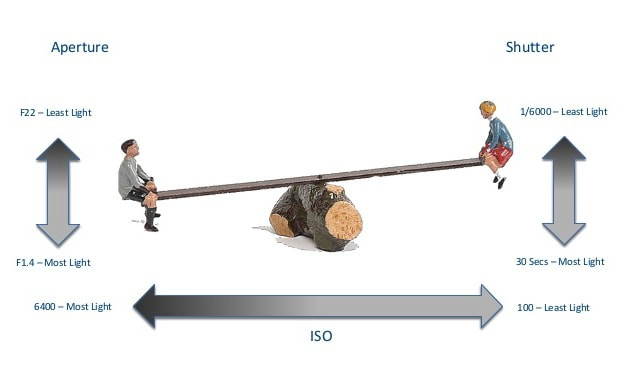 The seasaw is my favorite way of explaining exposure because it is simple. The photographer has one artistic element he or she typically tries to capture (example: shallow depth of field or freezing action). With this artistic goal in mind, the photographer sets the aperture or shutter speed for that choice, and then they must adjust the other two settings to create a balanced exposure. #compromise #givingin #youdontalwaysgetwhatyouwant #takingturns Metaphors = LifePretend--for a moment--that these three exposure settings are members of your family... (go with me for just a minute). Now, you're heading out to a restaurant for dinner with your exhausted mother, and no one agrees where to eat; 
0 Comments
Reading the Exposure Meter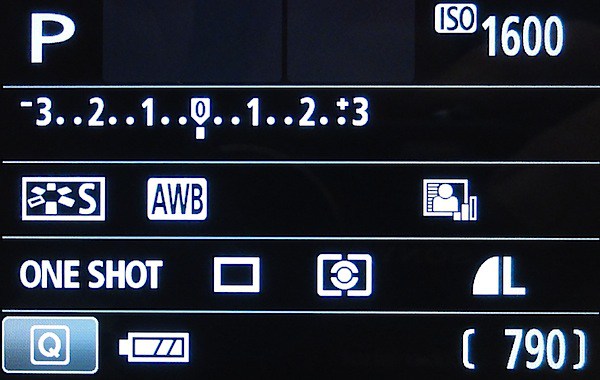 Remember, the word photography means 'writing with light.' That means that without light, we cannot take a picture! To capture the image with our cameras, we need to make sure there is the perfect amount of light coming through the lens. This is called metering (or measuring) our exposure. 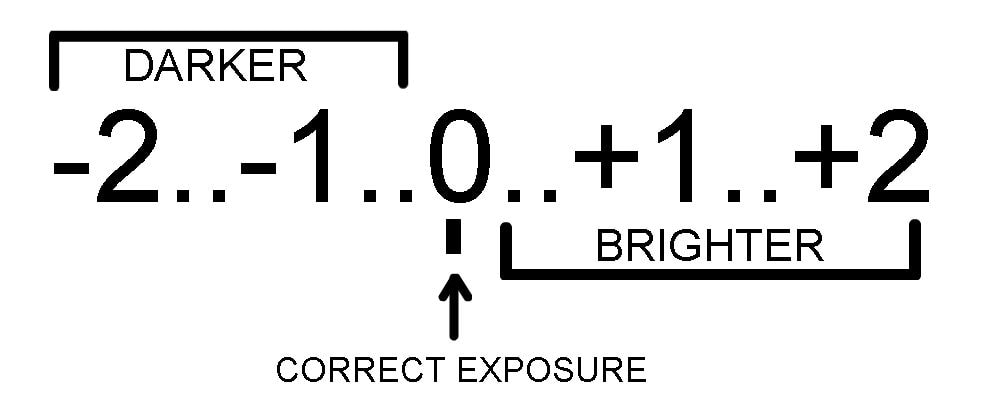 On the back of every DSLR camera there is an EXPOSURE METER that looks like this (above). The meter measures light available in the scene, and tells the photographer if they need to change their settings. If the meter reads to the right, the photograph will be very bright. If the meter reads to the left, the photograph will be very dark. the goal is (just like Goldilocks) to find the perfect sweet spot in the middle. 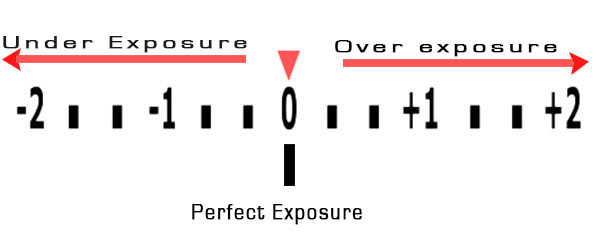 To photographers, we don't say, "It's too bright or too dark." Instead, we use the terms OVER EXPOSED and UNDER EXPOSED. Over exposed means that the light coming into the camera is too bright and your image will be blown out. Under exposed means the light coming into the camera is too little and your image will be really, really dark. Choosing the Right Meter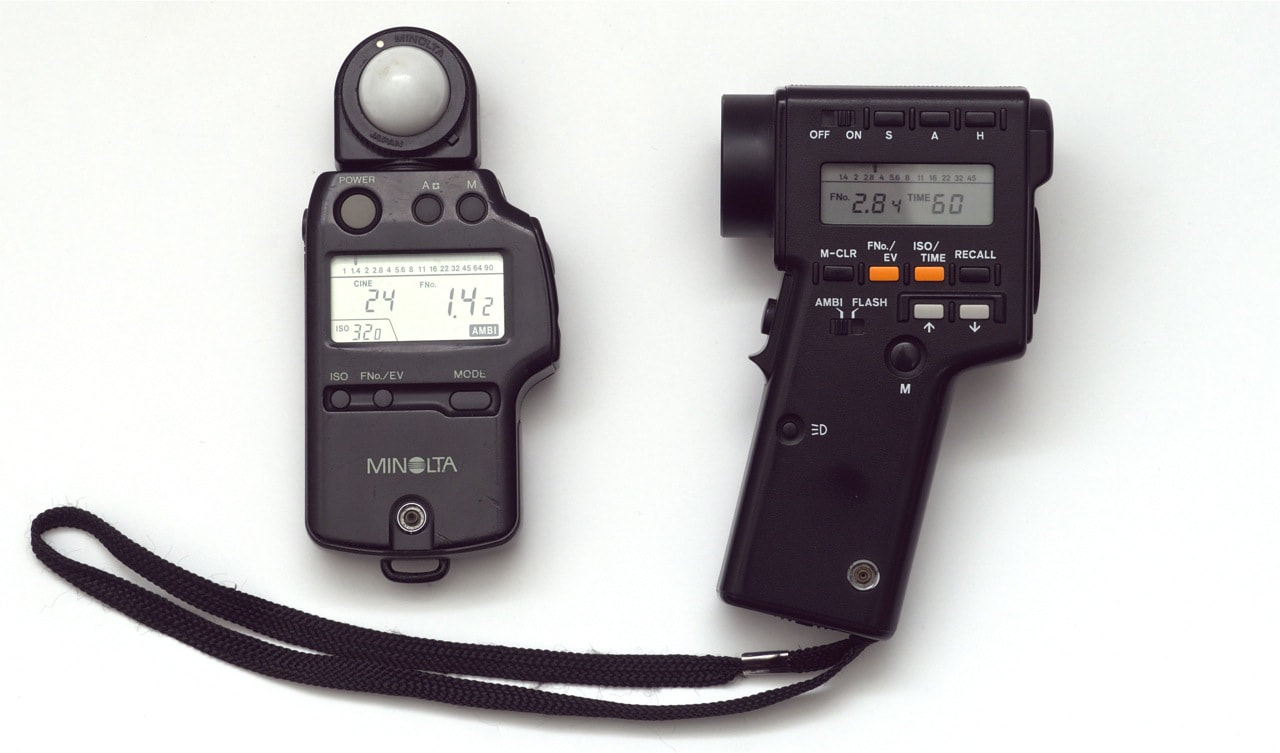 When shooting on film, photographers and filmmakers had to use light meters to measure the available light to capture the correct exposure for their images. These light meters still exist today and are called an INCIDENT LIGHT METER (left above) and a REFLECTIVE LIGHT METER (right above). These two light meters both measure light but in two very different ways.  Reflective Meters: Measure light in a scene from the camera's perspective. This tells the photographer what objects in the image will be brightest and darkest. (Advanced: The light meter gives f-stop and lux measurements so the photographer can set the camera's aperture, ISO, or shutter speed to the correct exposure settings.) Incident Meters: Measures the light falling on subjects from the direction of the light source itself. This tells the photographer how bright each side of a person's face might be. Important: Both light meter types ultimately provide the same information but in different ways;
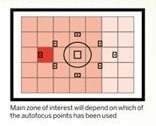
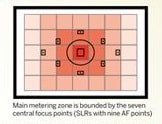
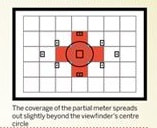
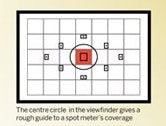
DSLRs & Metering ExposureDigital cameras use an internal LIGHT METER inside the camera to measure the available light. There are several different types of light meters and light meter settings to chose from (see below).
|